.png)
What is new in Active Directory?
There are interesting new features such as time-based group membership, privileged access management etc. but in this post I am not going to discuss those as I am going to write separate articles to provide more info about those new features. But if you need more info on it, you can find more details at:
In this post I am going to demonstrate how to install active directory on windows server 2016.
Before the AD is installed, it is important to understand what the minimum requirement is to install windows server 2016. This information can be found at :
Processor
- 1.4 GHz 64-bit processor
- Compatible with x64 instruction set
- Supports NX and DEP
- Supports CMPXCHG16b, LAHF/SAHF, and PrefetchW
- Supports Second Level Address Translation (EPT or NPT)
Core info is a tool you can use to confirm which of these capabilities your CPU has.
RAM
- 512 MB (2 GB for Server with Desktop Experience installation option)
- ECC (Error Correcting Code) type or similar technology
Storage controller and disk space requirements
Computers that run Windows Server 2016 must include a storage adapter that is compliant with the PCI Express architecture specification. Persistent storage devices on servers classified as hard disk drives must not be PATA. Windows Server 2016 does not allow ATA/PATA/IDE/EIDE for boot, page, or data drives.
The following are the estimated minimum disk space requirements for the system partition.
Minimum: 32 GB
Network adapter requirements
Minimum:
- An Ethernet adapter capable of at least gigabit throughput
- Compliant with the PCI Express architecture specification.
- Supports Pre-boot Execution Environment (PXE).
A network adapter that supports network debugging (KDNet) is useful, but not a minimum requirement.
So, in my demo I am using a virtual server with windows server 2016 Std. In order to setup active directory, we need to log in as local administrator. First thing to check is IP address configuration.
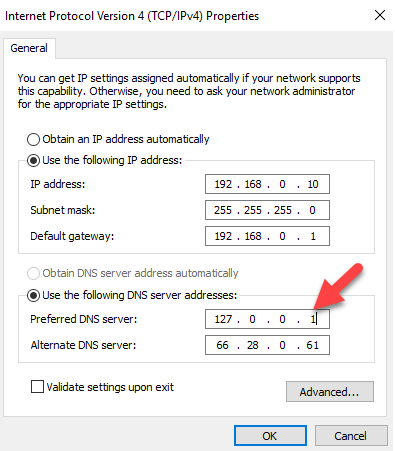
1. Once Active directory setup on the server, it also going to act as DNS server. There for change the DNS settings in network interface and set the server IP address (or local host IP 127.0.0.1) as the primary DNS server.
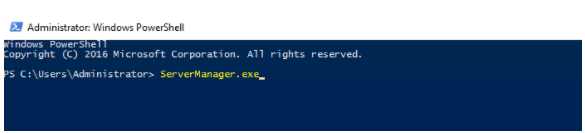
2. Then open the server manager. Go to PowerShell (as administrator) and type ServerManager.exe and press enter.
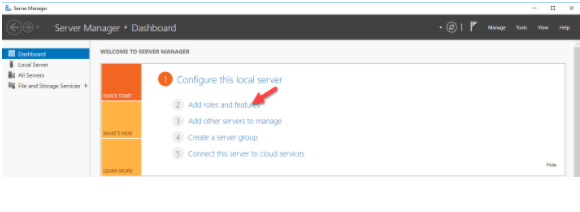
3. Then on server manager click on add roles and features.
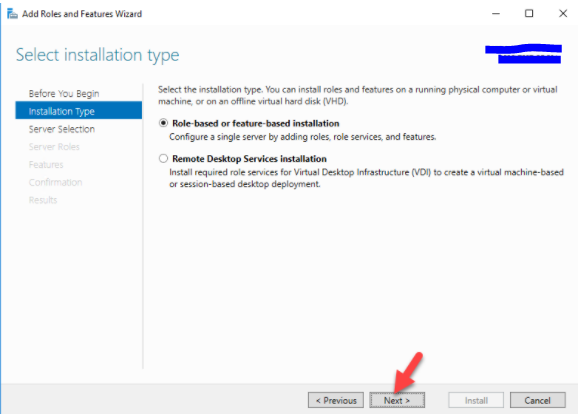
4. Then it opens the add roles and features wizard. Click on next to proceed. 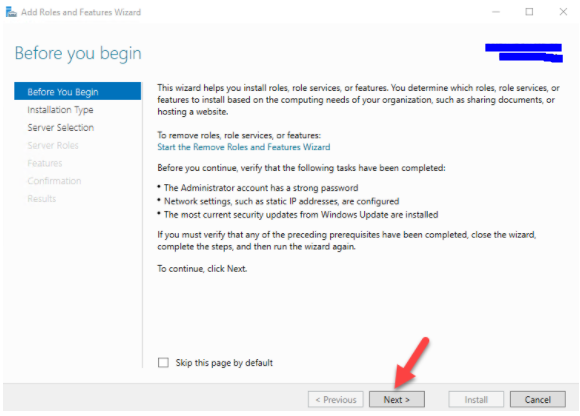
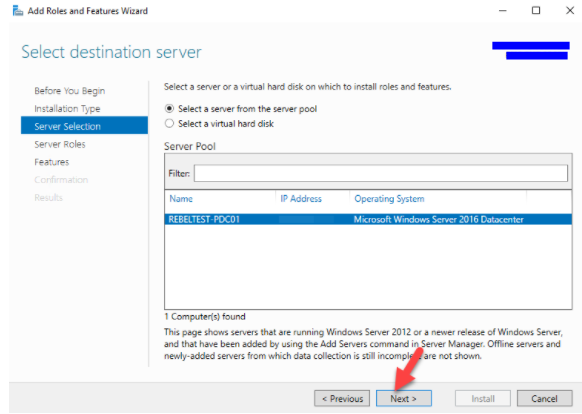
5. Then in next window keep the default and click next.
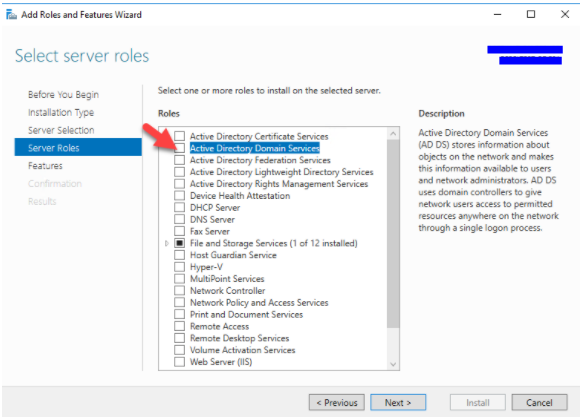
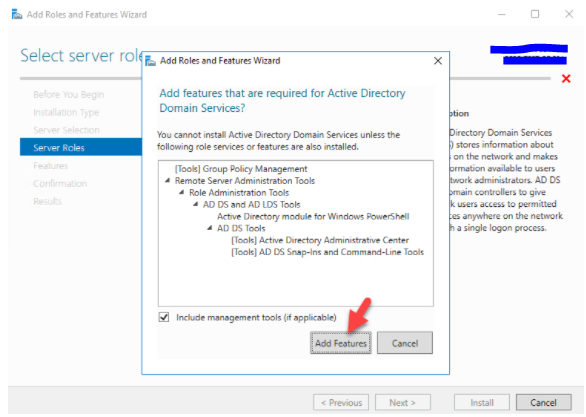
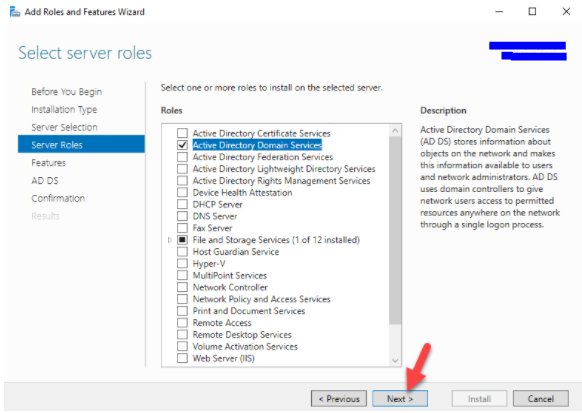
7. In next window from the roles put tick box for active directory domain services. Then it will prompt to show you what are the associated features for the role. Click on add features to add those. Then click next to continue.
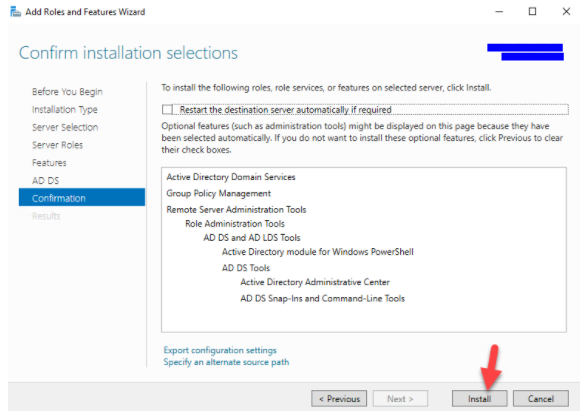
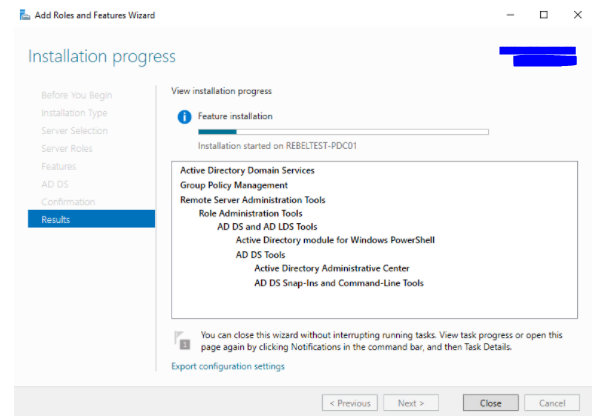
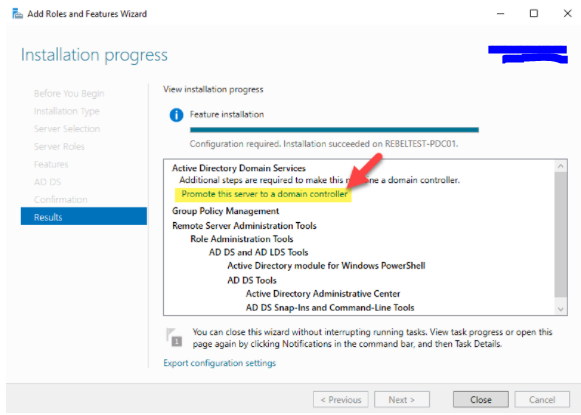

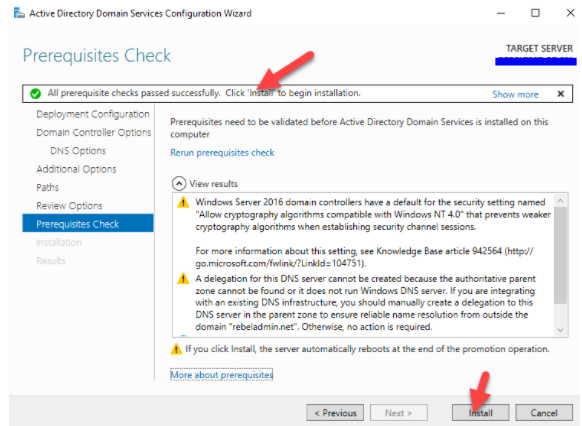
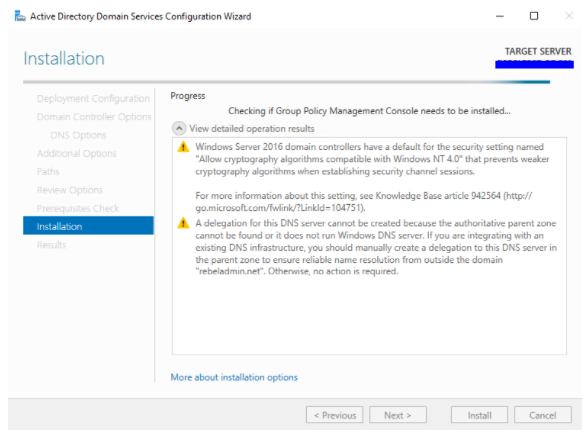
21. After the installation, the system will restart automatically. Once it comes back log in to the server as domain admin.
22. Once log in open the powershell (as administrator) and type dsac.exe and press enter. It will open up the active directory administrative center. There you can start managing the resources.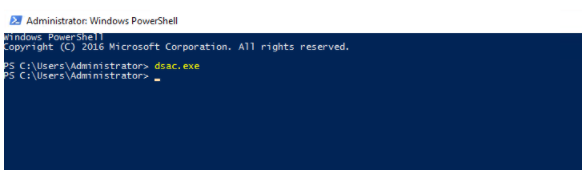

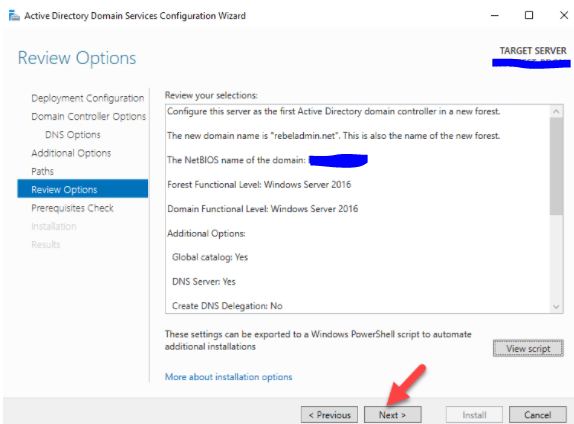
23. Also you can use Get-ADDomain | fl Name,DomainMode and Get-ADForest | fl Name,ForestMode from powershell to confirm domain and forest functional levels.