What is Azure Bastion Host?
Azure Bastion is a fully managed Platform-as-a-Service (PaaS) offering from Microsoft Azure that allows you to securely connect to your Azure virtual machines (VMs) through a web-based remote desktop protocol (RDP) directly from the Azure portal without needing to expose them to the public internet or use a VPN connection. It provides an additional layer of security for your VMs and simplifies remote access management. Think of this as a managed Jump Box or Jump Server service provided by Microsoft.
Before we move on to Azure Bastion, let’s first understand what is a Jump Box or Jump Host. Jump Box, is a virtual machine that sits over a virtual network and prevents all the other Virtual Machines from being exposed to the internet or other untrusted networks.
This means that Jump Box acts as the doorway to all the RDP connections made to your VMs. Furthermore, while using a Jump Box, only a single port will be exposed instead of multiple ports that are exposed when we don’t use it.
Now, let’s go back to Azure Bastion. Azure Bastion is a managed Jump Box. What does managed means? It refers to the ability to configure Jump Box according to personal needs. It is important to note that you cannot interact with it directly, but you can configure the settings. It supports both Remote Desktop Protocol (RDP) and Secure Shell (SSH) connections, and the Network Security Group (NSG) can be adjusted to enhance the security of your connection.
Azure Bastion Architecture
Azure Bastion deployment is per virtual network, not per subscription/account or virtual machine. Once you provision an Azure Bastion service in your virtual network, the RDP/SSH experience is available to all your VMs in the same virtual network.
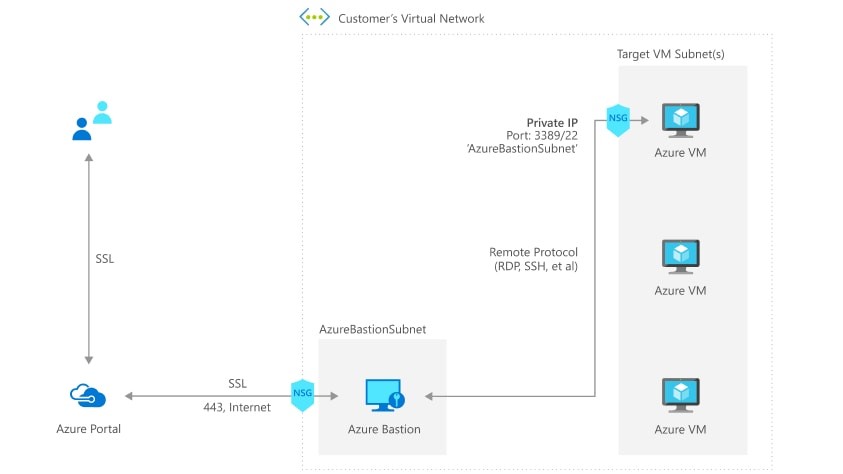
So here is how the connectivity works:
- You connect to the Azure management portal over HTTPS using any browser, then you select a virtual machine to connect to.
- Now the Azure portal connects to the Azure Bastion service using the Private IP on port 443.
- You get a new session in your browser and you can browse the desktop of the virtual machine and any other VMs inside your network using RDP or SSH.
Check out: Blog post on Azure Kubernetes Service.
Azure Bastion Use Cases
Now let’s list some possible use-cases. Azure Bastion can be very useful (but not limited) to these scenarios:
- Your Azure-based VMs are running in a subscription where you’re unable to connect via VPN, and for security reasons, you cannot set up a dedicated Jump-host within that VNet.
- You want to give developers access to a single VM without giving them access to additional services like a VPN or other things running within the VNet.
- You want to implement Just in Time (JIT) Administration in Azure. You can deploy and enable Bastion Host on the fly and as you need it.
Read More: About Azure Availability Set.
Azure Bastion Pricing and Features
-
Secure and seamless RDP and SSH access to your virtual machines.
-
No Public IP exposure on the VM.
-
Help limit threats such as port scanning and other types of malware targeting your VMs.
-
Uses a modern HTML5-based web client and standard SSL ports. This makes Firewall and other security rules very easy to manage.
-
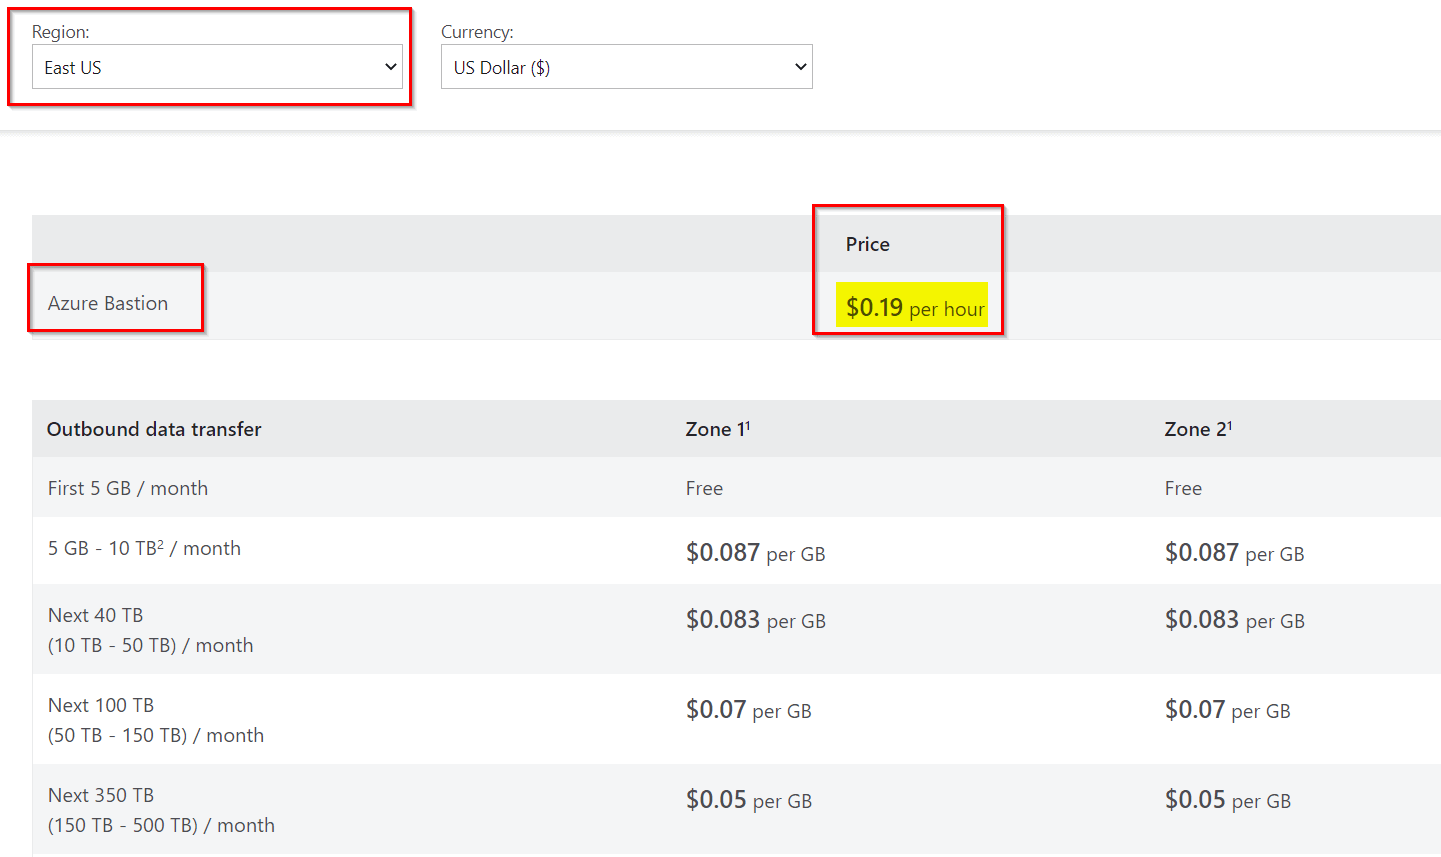
Fixed charge for the service. This is the charge billed hourly for deploying the service. E.g. in an East US location, this charge is around $0.19 per hour.
-
Outbound data transfer charges. This is the charge based on the total outbound data transfer. This is further tiered into various categories based on the total consumption.
Check out: Blog post on AZ 104.
How to Configure Azure Bastion?
-
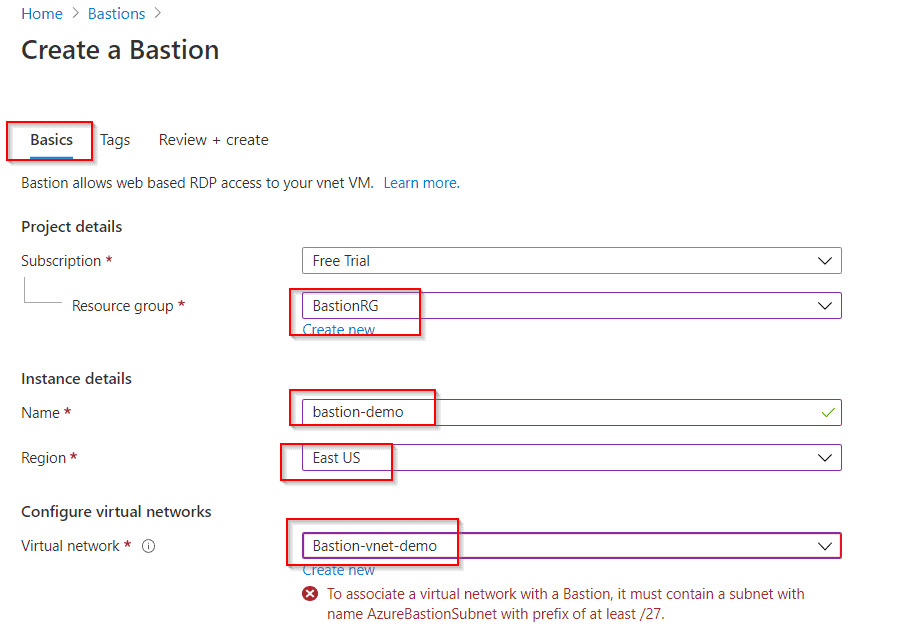
Log into your Azure Portal and head to the search area. In the search box > search for Bastion. Go through the results and click on the Create button as soon as you see Bastion with Microsoft as its publisher.
-
Enter your usual details such as Subscription, Resource Group, Instance name, Region, and Virtual Network as well.
- Once you reach the Subnet option, click on Manage Subnet Configuration.
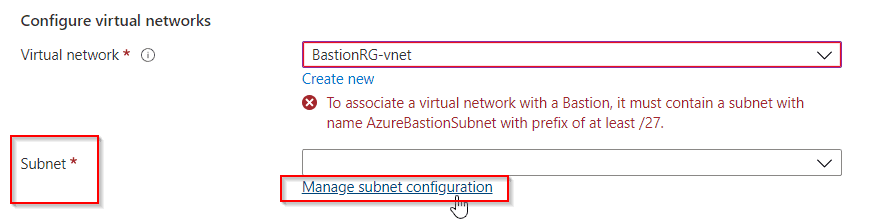
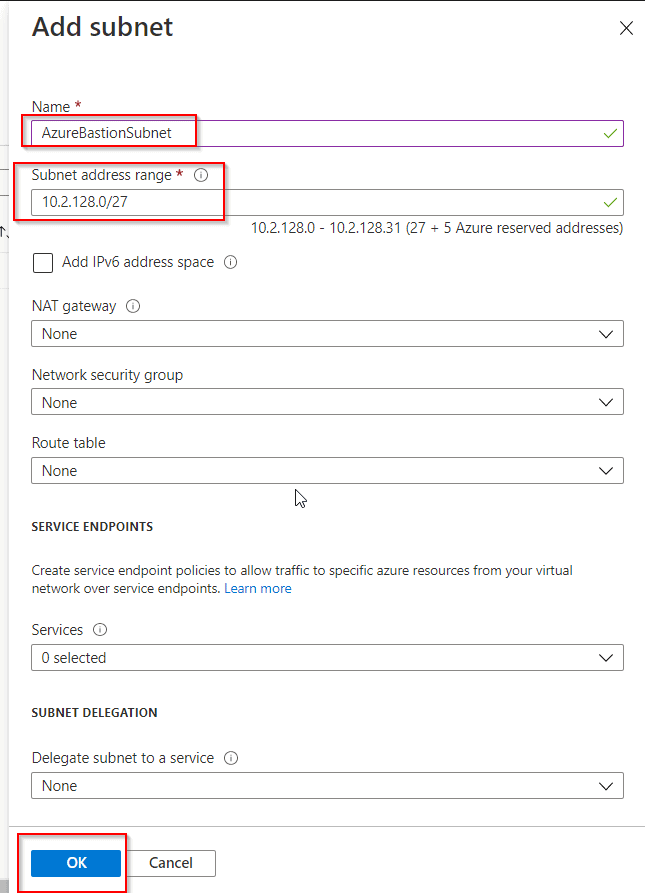
-
Now, click on Add Subnet and create a subnet with the name AzureBastionSubnet and a prefix of /27 or larger. Make sure you use this name only.
-
Head back over and select your Subnet on the Bastion creation page. Now you can opt to create a new Public IP address or use an existing one.
-
If you create a new one then provide a name and use Standard SKU.
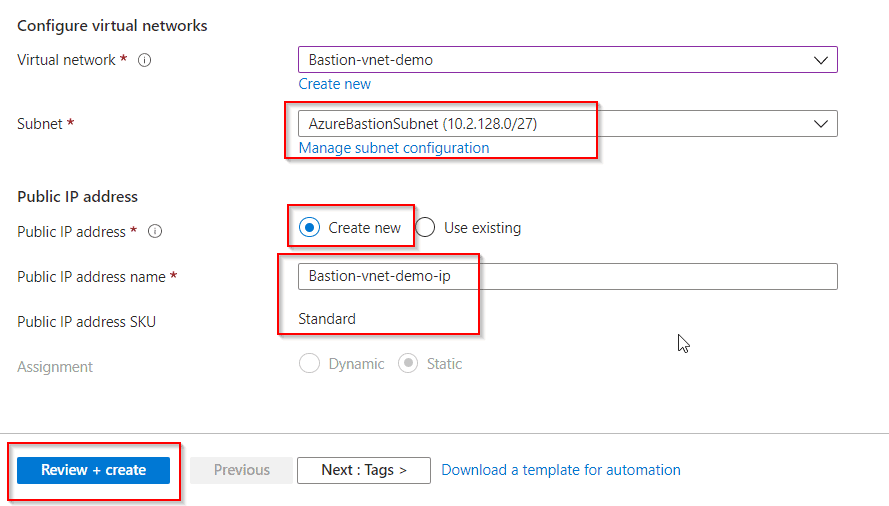
-
Then click on Review+Create. Then click on Create after validation passes.
Viola! Your Azure Bastion is ready
Check Out: Blog post on Azure Proximity Placement Groups.
Connect to the Virtual Machine
-
You can go to the Virtual Machines and select your newly created Bastion one and then click on Connect>Bastion, in the Overview section.
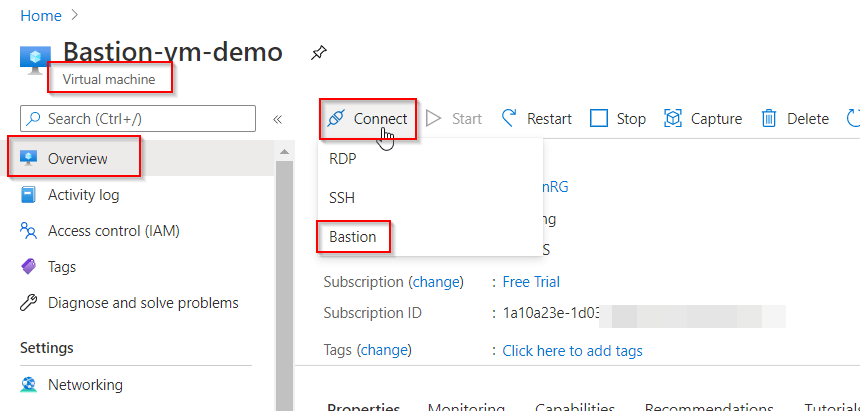
- Now click on Use Bastion and enter your credentials.
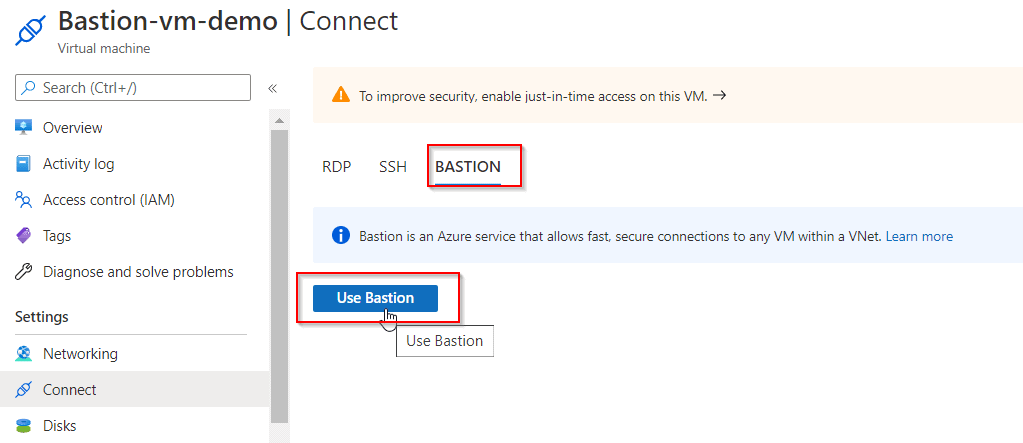
You’re now logged in! Now a new browser window opens with the Virtual Machine on that tab.
Also, you can add NSGs to both your Bastion subnet as well as your VM subnets to further enhance security. Read the Azure documentation article “Working with NSG access and Azure Bastion” to get a leg up on which ports and protocols you need to allow to and from the Bastion subnet.